

Overview
gentesty tests chatbots through their web interface. A real browser opens the page with your chat widget, writes the test case’s messages and reads the answers. For this, every chatbot needs three JavaScript functions:
| Function | Purpose |
|---|---|
| Init Bot JS | Opens the chat widget and waits until it is ready. |
| Write Bot JS | Types a message into the input field and sends it. |
| Read Bot JS | Reads the bot’s newest message. |
For the prebuilt providers Dialogflow, Kore.ai and Vapi, gentesty ships these functions, see Chatbot from a prebuilt provider. For any other chatbot, choose My own chatbot. An AI agent then opens your page, finds the chat widget, tries it out and validates the result against the live chatbot. If that does not work, the gentesty team sets up the integration for you.
Before you start
- You have the gentesty role Owner, Workspace Administrator or Bot Administrator. Only these roles can create chatbots.
- You have the address of a page where your chat widget runs, for example your website or a test page.
- The page is reachable from the internet, without a sign-in. gentesty loads it from its own servers and refuses addresses on an internal network. Firewall rules or HTTP headers must not block access.
- Your chatbot shows a welcome message when it opens and answers simple messages. The automatic validation expects both.
- Optional: you know where the chat widget sits on the page, for example in the bottom-right corner.
01 Create the chatbot
gentesty Chatbots › Add Chatbot
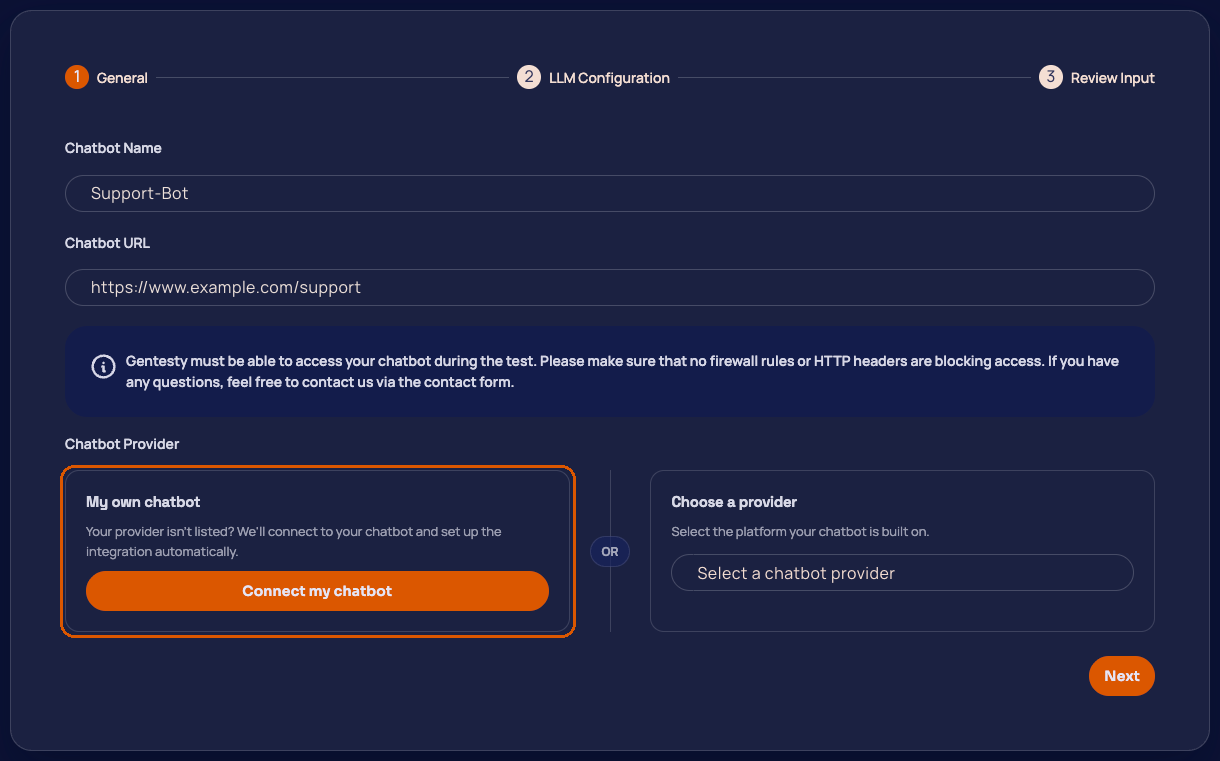
In the chatbot overview, click + (Add Chatbot) at the top right and fill in the General step:
| Field | Value |
|---|---|
| Chatbot Name | A name you will recognise the chatbot by in gentesty. |
| Chatbot URL | The address of the page with the chat widget. If https:// is missing, gentesty adds it. |
As soon as both fields are filled in, Chatbot Provider appears below with two options: My own chatbot and Choose a provider.
02 Start the generation
- Under My own chatbot, click Connect my chatbot.
- The dialog Where is the chatbot on the page? opens. In Chatbot location (optional), describe where the widget
is and how it opens, for example
speech bubble bottom right, opens on click. You can also leave the field empty. - Click Start generation.
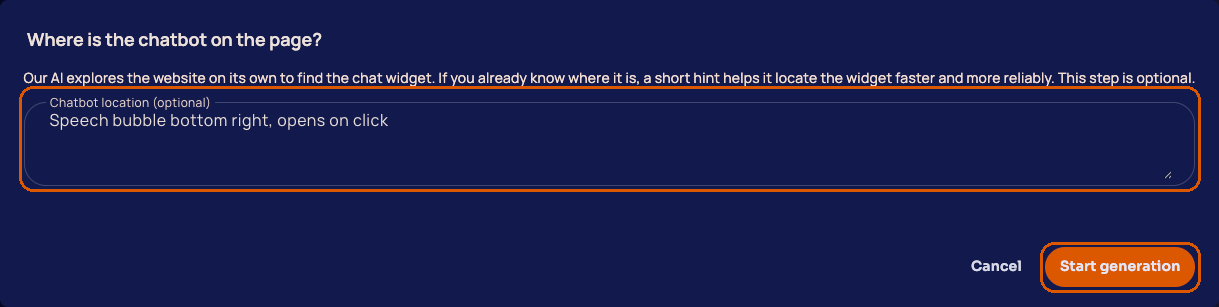
gentesty first checks that the chatbot URL is reachable. If it is not, the field shows an error and the generation does not start, see Troubleshooting.
This path skips the LLM Configuration step. gentesty assigns the first available LLM configuration of your workspace to the chatbot.
03 Follow the generation
The page shows the progress in four phases:
| Phase | What happens |
|---|---|
| Open page | gentesty opens your page in a browser. |
| Explore | The agent searches for the chat widget, including inside iframes and behind buttons that only appear after scrolling. It opens the widget, sends a test message and can close a cookie banner with a button such as “Accept”. |
| Validate | gentesty reloads the page and runs the generated functions as in a real test. |
| Ready | The integration is saved and the chatbot is active. |
The validation reads the welcome message, sends Hello, reads the answer, sends What can you help me with? and reads
the second answer. It only passes if both messages arrive in the chat and every answer is new. If gentesty recognises a
known chat-widget vendor in the page’s code, the agent uses that knowledge. For some vendors, gentesty first tries a
ready-made template.
If an attempt fails the validation, the agent refines the integration and tries again. The page then shows Attempt 2 of 2. Show details lists every step the agent takes.
This usually takes a few minutes. The generation keeps running if you leave the page. Until it is done, the chatbot’s card in the overview says that it is being created.
04 Check the result
Integration ready: Click Go to chatbot. The chatbot’s detail page opens. Create your test cases in the Evaluations tab, see Getting started.
Automatic setup not possible: gentesty could not generate a working integration. The gentesty team is notified automatically and sets up the integration for you. You don’t need to do anything else.
- Back to overview takes you to the chatbot overview. The chatbot stays there, marked as being created, until the team has set it up. Until then you can neither open nor delete it.
- The dashboard does not show the reason for the failure. The gentesty team receives it by email.
- The dashboard does not offer a way to restart the generation. If you want to tell the team something, for example that the page requires a sign-in, contact us.
Adjust the integration manually
gentesty Chatbots › Your chatbot › JavaScript
For chatbots connected through My own chatbot, the detail page has a JavaScript tab. It shows the integration’s three functions. Each field is the body of a function that runs in the browser on your page.
| Field | Receives | Purpose |
|---|---|---|
| Init Bot JS | nothing | Opens the widget. Returns a promise that resolves once the widget is ready. |
| Write Bot JS | gentesty_message, the message text | Types the text into the input field and sends it. |
| Read Bot JS | gentesty_timeout_per_message, the wait time per message | Returns the bot’s newest message as text once it is fully displayed. |
Init Bot JS starts with the gentesty helper functions (gentesty_…) that Read Bot JS and Write Bot JS use. The actual
initialisation is at the end of the field.
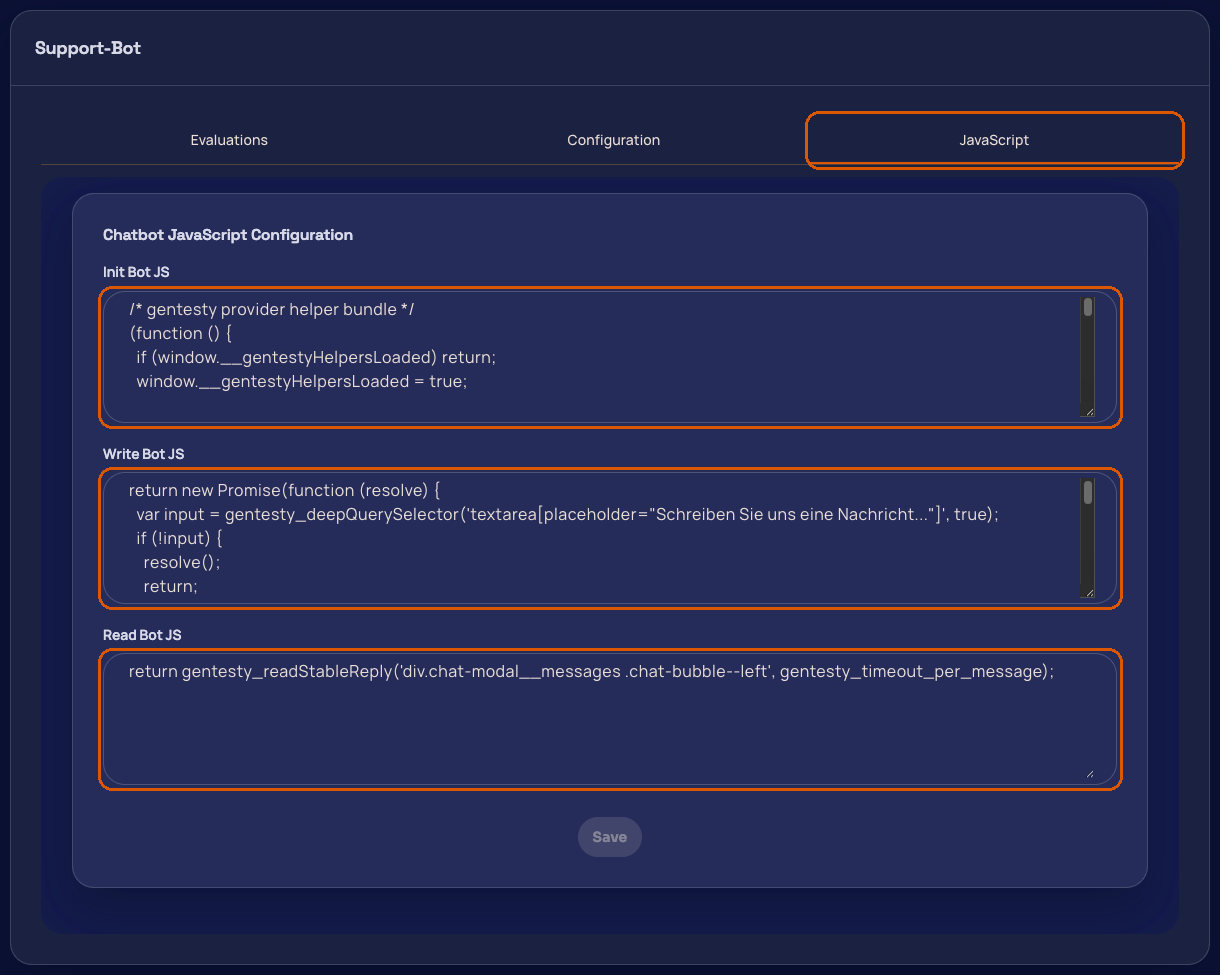
Edit the fields and click Save. gentesty does not check manually edited code in advance. Start a test case afterwards to verify the change.
Chatbot from a prebuilt provider
gentesty Chatbots › Add Chatbot
If your chatbot runs on Dialogflow, Kore.ai or Vapi, there is no generation:
- Enter Chatbot Name and Chatbot URL as in step 1.
- Under Choose a provider, select your chatbot’s platform.
- Click Next. Choose the LLM Configuration if asked, check your entries under Review Input and click Save.
The chatbot is active right away. gentesty ships the integration, and there is no JavaScript tab.
Troubleshooting
| What you see | Cause | Fix |
|---|---|---|
| Please enter a valid URL. | The chatbot URL is not a valid http or https address. | Enter the full address, for example https://www.example.com/help. |
| We couldn’t reach this URL. … | The page does not answer or answers with an error status, the address points to an internal network, or a firewall blocks gentesty. | Open the page in a private browser window. It must load without a sign-in and without a VPN. |
| Chatbot Provider does not appear | Chatbot Name or Chatbot URL is empty. | Fill in both fields. |
| Automatic setup not possible | The agent did not find the widget, the validation failed in every attempt, or the time ran out. | Nothing to do, the gentesty team sets up the integration. See step 4. |
| The chatbot stays marked as being created for a long time | The generation is still running, or the gentesty team is setting up the integration. | Wait. If a generation gets stuck, gentesty hands the chatbot over to the gentesty team automatically. |
| Runs of a connected chatbot end with an error, but the chatbot works | The integration no longer matches the page, for example after a change to the widget. | Adjust the JavaScript, see Adjust the integration manually, or contact us. |
Stuck? Contact us with the chatbot’s name, the chatbot URL and the time of the generation.